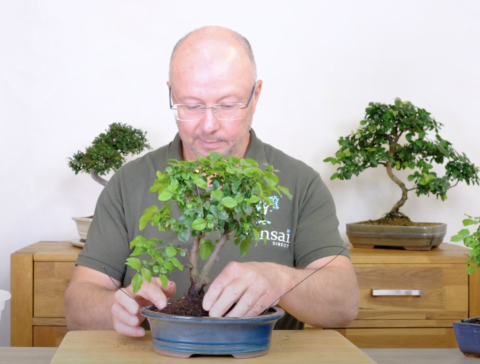
Hi, I’m Lloyd from Bonsai Direct, and in this video I’ll show you how to dramatically improve a little cheap starter bonsai tree — using simple tools and techniques anyone can try at home.
Whether you’ve just received your first bonsai or have a small collection already, this guide will help you understand how to reveal the true beauty of your tree. From uncovering the nebari (the root flare) to repotting into a new pot, we’ll go step-by-step through a beginner-friendly transformation that makes your bonsai look more natural, balanced, and tree-like.
Let’s get started!
Getting Started: Tools and Preparation
First things first, you don’t need fancy equipment to transform your cheap starter bonsai. A simple spatula, knife, or even a chopstick will do. Begin by gently loosening the soil around the edge of the pot. Work your tool down the sides, carefully separating the root ball from the pot. Always check for any wires securing the tree underneath—cut them if needed before lifting the tree out.
Once your bonsai is out of its pot, set it aside. Now, focus on the base of the trunk—this is where your bonsai’s personality begins. In Japan, this area is called the “nebari,” the point where the roots flare out from the trunk. Often, this feature is hidden beneath soil, but exposing it can instantly make your tree look older and more powerful.
Exposing the Nebari of this Little Cheap Starter Bonsai: Reveal the Tree’s Character
With a light hand, use a chopstick to gently remove soil from around the nebari. Take your time and work carefully—you’re not disturbing the main root ball, just the surface. As you uncover the nebari, look for interesting surface roots. These roots, radiating from the trunk, give your bonsai a sense of age and stability, just like a mature tree in nature.
A handy tip: don’t worry if your tree is out of its pot for a while. As long as it’s not in direct sun and the roots stay moist, it will be fine for several hours. Once you’ve exposed the nebari, grab a toothbrush and a tub of clean water. Gently scrub the trunk and soil surface to remove loose dirt. This simple step brings out the trunk’s texture and makes the nebari stand out even more.
Pruning for Structure: Less is More
Now it’s time for some basic pruning. Start by inspecting the roots you’ve uncovered. Decide which ones to keep based on their position and thickness. Roots that radiate evenly around the trunk are ideal. Trim away any roots that are too high up or clutter the look of the base. This encourages a balanced, attractive root flare as your bonsai matures.
Next, move on to the branches. Look for twigs that cross through the canopy or clutter the inside of the tree. Remove these to open up the structure and highlight the trunk’s movement. Remember, you want to see the main trunk and branches clearly. This selective pruning will make your bonsai look tidier and more tree-like, even before you touch the canopy.
Repotting: Setting Up for Future Growth
If you want to take your bonsai’s transformation further, consider repotting. Prepare your new pot with potting mesh over the drainage holes and secure it with wire. Add a layer of fresh, well-draining soil at the bottom. Tease out the outer roots of your bonsai’s root ball with a chopstick, removing old soil and encouraging new root growth.
Position your tree in the new pot, ideally with the nebari slightly above the soil line and the trunk slightly off-centre for a natural look. Fill in with soil, firming it gently around the roots. Water thoroughly to settle everything in place.
Final Touches for a Cheap Starter Bonsai and Ongoing Care
After repotting, tidy up any long shoots or stray branches to shape the canopy. The goal is to maintain a balanced, open structure that showcases the trunk and nebari. Over time, continue thinning out crowded areas and removing crossing branches. This ongoing process is what makes bonsai so rewarding—your tree will evolve and improve year after year.
Not only does this method make your starter bonsai look more mature and impressive, but it also makes watering easier and promotes healthy root growth. Plus, you’ll find it’s much easier to care for, with less soil spilling over the pot’s edge.
Conclusion: Unlock the Hidden Potential of Your Bonsai
Transforming your cheap starter bonsai doesn’t require expensive tools or years of experience. By focusing on the nebari, cleaning the trunk, and doing a little strategic pruning, you can make a dramatic difference in just an afternoon. Remember, every bonsai is unique—enjoy the process of discovery and improvement.
Ready to get started? Grab your tools and give your little bonsai a makeover. For more tips and in-depth guides, check out Bonsai Direct’s other tutorials. Transform your cheap starter bonsai today and watch your miniature tree thrive!


0 replies