Welcome to the final chapter of our journey with this incredible 60-year-old Japanese Black Pine bonsai (Pinus thunbergii). Expertly guided by Bonsai Master Lloyd Noall from Bonsai Direct. Lloyd shows us this magnificent Japanese Black Pine Bonsai restyling and repotting
In this concluding episode, we dive into one of the most critical stages of bonsai care. Root Pruning, Re-Potting, and a Final Overview. This is where all the careful styling and structural work truly comes together!
Lloyd will walk us through the art of root pruning. Also, explain the importance of positioning in a new pot, and share insights on how to balance the tree’s design for the future. After weeks of meticulous work, we finally get to see the full transformation—and trust us, it’s worth it!
Stay tuned for expert techniques and fascinating insights,. Take a closer look at how this majestic bonsai is shaped for the years ahead. Let’s get started! 🌿✨
If you missed Part 1 View it here: It’s called The Japanese Black Pine Bonsai Tree | 60 years old – The Nebari
If you missed Part 2 View it here: It’s called Japanese Black Pine Bonsai Tree | 60 years old – The Trunk & Branches – Styling & Wiring
Time is so precious, and that’s why I thought in this video (Part 3) of the Japanese Black Pine Bonsai restyling and repotting video, I will just cut the chase and get it done. That way it saves you time watching the video 🤣. But of course, if you want to watch it, keep watching.
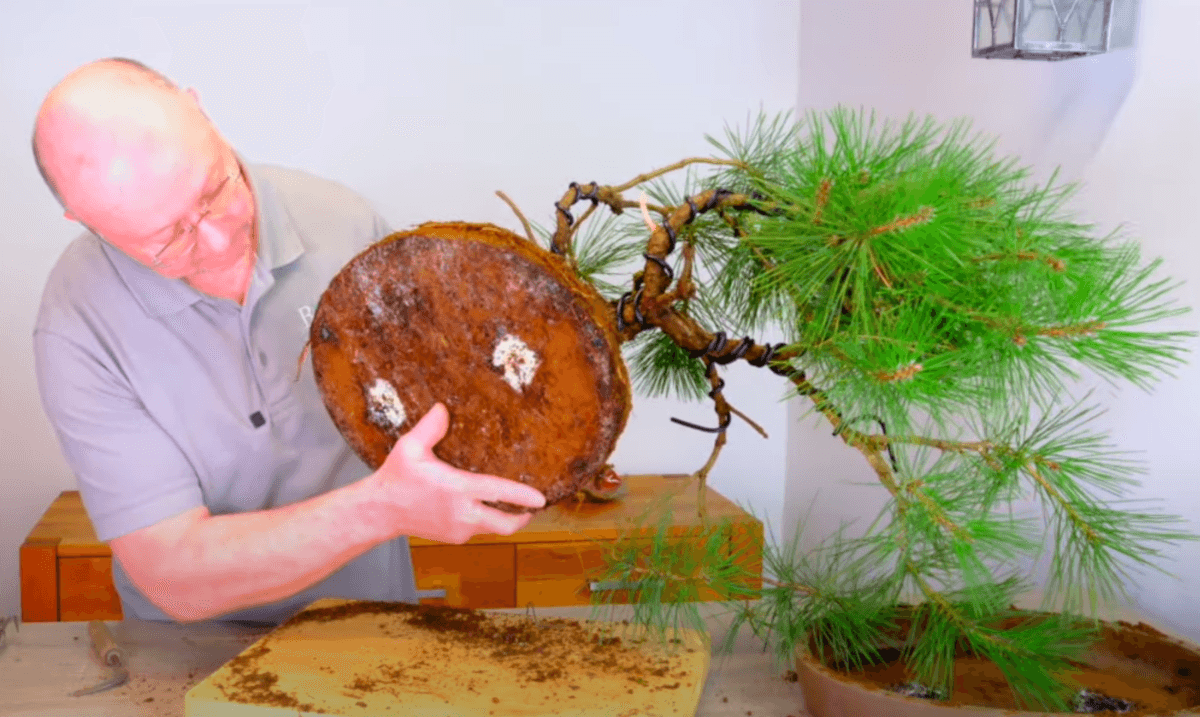
The Wonderful Scent of Pines
I love the smell of pines. Well actually, it’s the mycorrhiza, in this case, not really the pine tree. This lovely creamy white fungus we’ve got here helps the trees grow. It should smell like fresh mushrooms. It shouldn’t smell stagnant, and it should be a nice bright colour—not dark and grey or blackish. That’s lovely!

Choosing the Right Pot
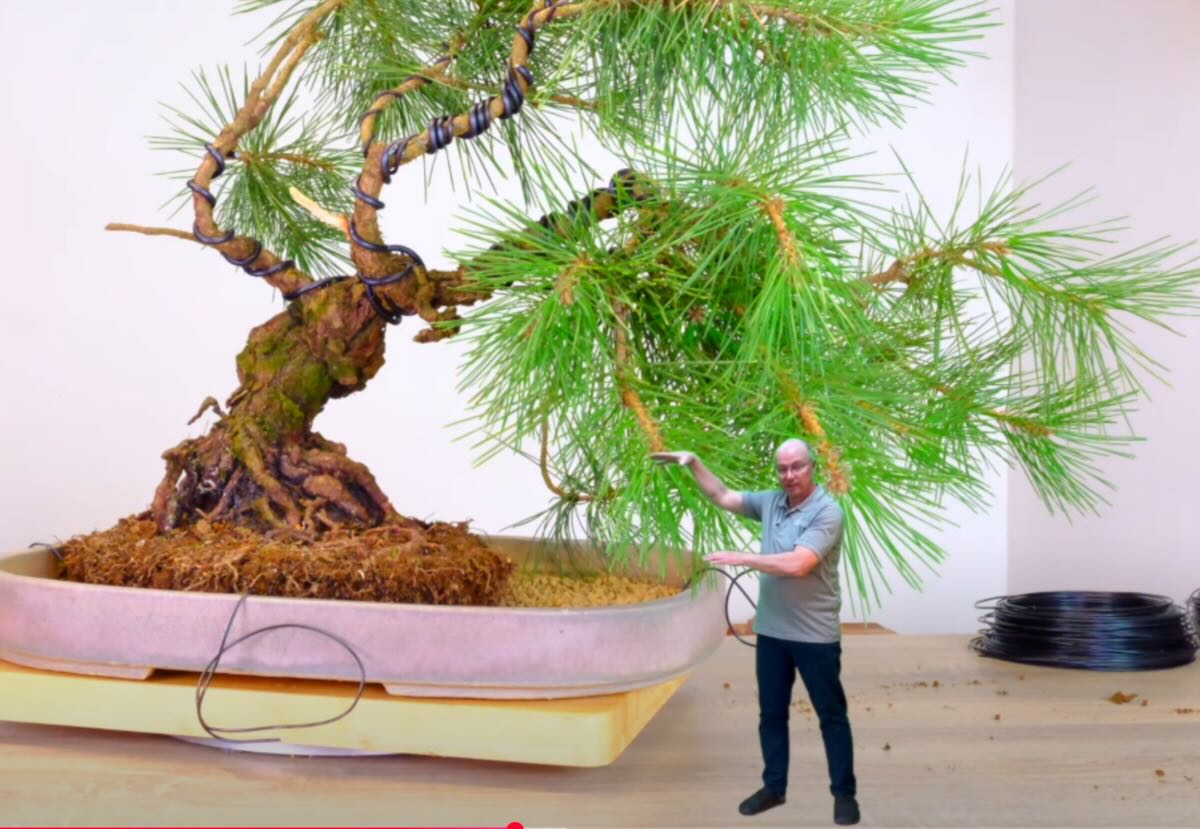
As you can see, I have decided to go for a much bigger pot. This is a pot which I’ve had for many years, and I’ve used it with different trees. Like always, you end up with a stack of pots. I wouldn’t say it’s the right pot, but it will certainly do for now. It has plenty of space for the pine to get its new roots out, helping all those lovely little shoots and branches grow over the next few years.
With a lot more space in the pot, that gives us room to reposition the tree to make sure we get the correct viewing angle. But also, we can push the tree to the far end, which allows the tree, as it comes up and over, to fill out the space of this pot. So the two are balanced, with plenty of space in the pot and the canopy overhanging it.
Shaping the Bonsai Tree | Pine Bonsai Restyling and Repotting
We’ve got the main shape sorted now. These branches are now all flowing in the right way, and I really like this one and this one because they kind of copy each other. The main trunk flows out nicely, and we’ve got this lovely curve and flow. That looks good.
There’s plenty of space between the main branches and the trunk, which is important so we can define this part of the tree. Over the next few years, when we get new branches growing from these areas, the upper branches will be replaced with lower twigs and branches.
Fine-Tuning the Growth
I’m going to do a bit of pruning around here, thinning out a little because it’s quite bunchy. I shall choose some branches growing roughly in the right direction, and from those, we can grow more branches in that direction. All the time, we are thinking of moving that way! The wind is blowing that way, and everything is going with the wind. We don’t want to keep it dead straight—we want a little bit of movement, side to side and undulating.
If we can get that right, and we look at the bonsai and think, “it feels windy today,” then I’ve kind of cracked it. At this stage, I’m only going to remove a couple of biggish branches—ones that are really growing in the wrong direction. Thinning out allows a little bit of space for the smaller shoots and branches to grow, which we will then guide in the right way.
Pruning for Strength and Balance
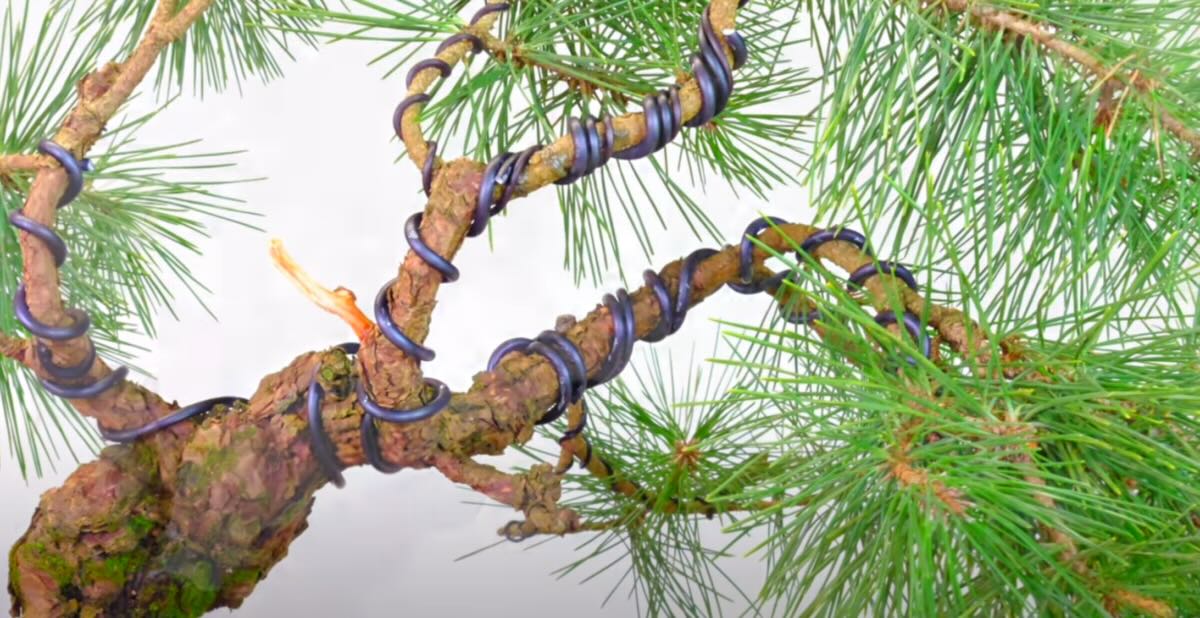
Now I’m just removing the dominant growth at the end of the branches. This is last year’s spring and summer growth. It’s very heavy on the ends of the powerful branches. I’m not going to take off too much because I want to maintain the strength of the tree.
Here, I’m just removing the big buds from the ends of the really powerful shoots—the ones left behind after I pruned back last year’s summer growth. I am making sure to leave the secondary bud (the smaller one) behind because that one will start to grow. This just helps keep the ends of the branches nice and strong.
By removing the big dominant bud, this will slow the growth down at the end of the big shoots, forcing energy further back down the older parts of the branches.
The Beauty of Bonsai Trees
Look at the sap flowing from this cut. Trees really are amazing and beautiful. This will now dry and seal the cut. The next part will be growing the new buds, and we’ll meet back in perhaps a year’s time to see how that’s going. But for now, it’s time to put it outside, let it get used to its new pot and new shape, settle down, and get ready for spring and summer growth.
Final Thoughts about Pine Bonsai restyling and repotting
Take care! I hope you’ve enjoyed these Black Pine videos. They’ve been great fun, and I’ve enjoyed making them. I’ve got lots more videos planned for the coming year, so if you want to see those, please subscribe and hit the notifications button—that way, you won’t miss them.
Spring is coming, so if you can, take the time to have a real close-up look at those lovely little buds bursting into life!


0 replies