In this Bonsai Tree Video, Lloyd Noall, a bonsai master from Bonsai Direct, takes us through the process of cleaning, styling, and wiring a stunning 55-year-old Japanese Black Pine (Pinus thunbergii) bonsai tree. The Japanese Black Pine is known for its resilience, rugged beauty, and striking dark bark, making it a favourite species. Its long needles and strong, flexible branches are perfect for shaping and creating dramatic, powerful bonsai forms. This particular tree has grown out of shape and requires some attention. Lloyd demonstrates how to bring it back to its full potential by carefully removing select branches and wiring it to achieve a refined structure. Watch as he guides you through the first steps of this impressive transformation, sharing valuable bonsai styling techniques along the way. Perfect for beginners and seasoned enthusiasts alike, this video offers expert insights into the delicate art of bonsai refinement. Don’t miss the opportunity to learn from a true bonsai master! An evergreen and hardy variety with amazing nebari (root flare) and striking accentuated twisting trunk design. We hope that you find this video inspiring.
May 2025 update. Lloyd has released a follow up video which is now available towards the bottom of this post.
The History of this Japanese Black Bonsai Tree
Lloyd originally imported this Japanese Black Pine, from Japan, over 25 years ago. Over the years, Lloyd has focused on developing the nebari (the root flare) and thickening the trunk, ensuring the tree has a strong foundation and excellent health. Now, with the roots well-established and the tree in great condition, it’s time to begin refining the structure of the branches.
Purchased about 25 years ago from my good friend Bert, an importer and lover of Japanese bonsai, who sadly passed away several years ago. It was one of several trees that needed to grow out in order to be restyled. This one’s for you Bert.
In this bonsai tree video, Lloyd demonstrates how to carefully remove selected branches and wire the remaining ones into a more balanced and aesthetically pleasing shape. This marks the next phase of this bonsai’s journey—transforming it into a refined and elegant specimen. Watch as Lloyd shares expert techniques for styling and shaping the Japanese Black Pine, showing you how patience and proper care over time lead to stunning bonsai development.
Transcription of this Bonsai Tree Video | Styling & Wiring this Japanese Black Pine Bonsai Tree
Introduction of this Bonsai Tree Video with Lloyd from Bonsai Direct
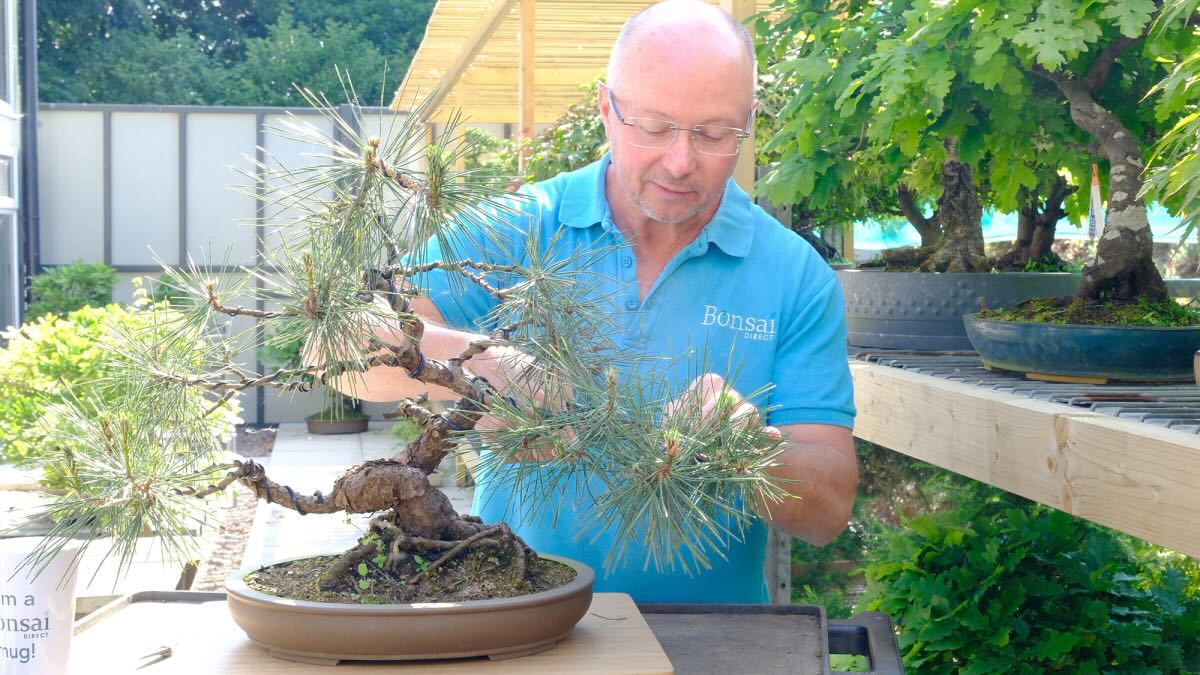
Hi everyone! I went to work this morning not quite knowing what I was going to do. The growing season is now over, so a lot of the pruning has slowed right down. Obviously there’s still lots to do, but I was kind of thinking, I fancy a bit of a change. And then I heard a shout as my daughter Holly said “Dad, get this tree sorted please”. So I did.
And here it is. It’s a Japanese black pine (Pinus thunbergii) and it’s in desperate need for some TLC (Tender Loving Care). So, now’s the time. We’ll spin it around and have a look and really get to know the tree. As you can see, it’s overgrown. The branches have got long and leggy. We’ve got a little bit of die back in places and really does need some time spent on it now.
Cleaning Up the trunk & Nebari (Root Flare) in this Bonsai Tree Video
I don’t like working on trees that are all weedy and dirty, and that’s just my sort of preference. So I’m going to go through and clean it all up. The Black pine has the most amazing bark. It’s gnarly and it’s craggy, and it’s got different colours in it. And by giving it a good clean up with some nice fresh water and an old toothbrush. I am starting at the top, just work my way down, scrubbing off any old moss and any old soil that’s got caught up in those little fissures, and bring out all the details of this amazing trunk.
I have to admit, it made me laugh when I was watching this, this clip, and I saw some little creepy crawlies running around and popping out of the soil and all sorts of things like that. But that’s not a problem to me. As long as the tree is nice and healthy, they’re not doing any harm, so I just leave them alone. So that’s trunk pretty much cleaned up now. It’s bound to need some more cleaning to do, once it dries out a bit, but for now, that’s good. We’ve taken off all the moss. We can really see the the trunk shape a lot better now. I have got rid of all the weeds and all the sort of grubby bits on the soil surface, and now I’ll have a tidy up.
Well, that looks so much better! It always amazes me how much better they look just giving them a good clean, cleaning the trunk, cleaning off the soil, give the pot a bit of a wipe and it looks so much better already and we haven’t done any styling, restyling, anything to it whatsoever, but it does look so much better.
Planning the Design of this 55 year old Japanese Black Pine Bonsai Tree
I’m not going to rush straight in and start chopping off branches and bending and wiring and all that sort of stuff. I always think the planning is the most important part. If we get the planning right, then the next bit, the, the actual physical bit, the wiring and the shaping and pruning bit, then that is fairly simple. Also, we’re very unlikely to make a mistake if we’ve got the planning right. So this is where I just spend a bit of time, grab a cup of tea, and I can now just take my time and enjoy this process.
Lloyd Considers the Current Design of the Bonsai
This heavy branch down here is on the outside of this curve. Moving up to here. Okay, I’ll make sure you can see that. This branch is still on the outside of this curve of the trunk, so that’s good. This one here. Moving up the tree. Our next one is here. Can you see that? I’ll spin it around doing a bit of twisting in that. So I hope it doesn’t make you feel a bit dizzy. So he’s quite weak. But we’ve still got this one here, so we could possibly do something to create some depth with that one. So as the trunk meanders up, it does this little kind of a twist back here, which is nice. So we’ve got the ‘zig-zagging’ effect going on basically. And most of the branches are in the right position. So they’re on the outsides of those curves. So I think we can use most of those.
Lloyd Demonstrates the Wiring so that you can see the Refinement of the New Design
Watch as he applies the bonsai wire and gently manipulates it so give shape to the branches. He removes some of the branches to simplify the design with concave branch cutters. Knobs are removed with bonsai knob cutters and filled with bonsai sealant to stop the sap from weeping.
Lloyd continues… There’s just one last bit that we need to do. And that’s just to change the dominance again up here. And by taking this down. Okay. So, it’s going to look a little bit odd for a while. Now, what I’ve done basically is this top shoot here is very dominant. And he’s just going to want to keep growing up and up. So I’ve taken it down and I’ve now allowed some space up here. There is a bud here, that will grow up to be the top of the tree. If not, there will be plenty more new shoots around this area. By bending the branch down, it will grow more slowly and allow the top tree here to form nicely. Now it will also increase the taper as well by the way. So the new shoot coming up will be thinner. Smaller.
Lloyd Turns the Bonsai so we can Appreciate the Improvements
We have a long journey ahead of us. Still lots of buds to grow, lots of twigs to form and shape and lots of styling to do. Fantastic. But without doubt we are now on the right road to making a beautiful bonsai. Take care.
May 2025 Update : Japanese Black Pine Bonsai Tree | 55 years old – Restyle Update – Removing the Wire in this Bonsai Tree Video
Restyling Catch-Up on the Black Pine. A review of this Bonsai Tree Video
Hi everyone, today in this bonsai tree video we are going to be doing a catchup on this Black Pine that we started restyling a few months ago.
A quick recap – this is how the bonsai started off before we started restyling.
As you can see we’re outside today, it’s lovely to get out of the studio, it’s a beautiful sunny morning and the birds are singing. So it’s lovely out here. This is one of our outside growing areas and I love this space.
Assessing Growth and Wire Concerns
So let’s have a look and see what needs to be done. Overall it is growing really well & I’m really pleased with it. In just a few months we’ve got some nice buds, some nice strong buds growing. The top’s coming on really well. The wire is starting to look a little bit tight so the wire needs to come off. So we’re going to do that and if some of the branches haven’t quite set, then we’ll have to rewire and go from there.
How to Tell When Wire is Too Tight
Also what I’ll do is I’ll give you a close-up of the wire and I’ll explain to you how I know that the wire is looking too tight. It’s not always obvious, but I’ll give you some little tips on that. With the wire what we’ve got to do is to make sure that the tree doesn’t start to grow around it, so you start to get that horrible wire scarring effect. So we need to make sure we take the wire off before that happens.
Timing Wire Removal and Monitoring Growth
What we’re trying to do is to leave the wire on as long as possible, to let the branches set, without the tree actually growing around the wire. Therefore what I do is I check it regularly, especially through the springtime, because the trees grow quite quickly. I check it regularly, once a week, I have a quick glance down and what I’m looking for is particularly any areas where I’ve put some quite tight bends in there.
What to Look For in Stressed Branches
Because those are the areas where it’s really quite sort of stressed, if that makes sense. Down the the sort of longer more open branches where I’ve maybe just bent it a little bit it’s not too bad. But certainly areas where is a tight bend, I check those more carefully and what I’m looking for is places where I can see where the the bark is in contact with the wire and it’s just starting to sort of come up. So the bottom of the wire has disappeared, if that makes sense.
Spotting When Bark Begins to Swell
When you put the wire on freshly, you can see almost right around the wire as it making contact with the tree. And then over a period of time, as the bark and the cambium layer underneath, starts to swell and grow out. It starts to form this sort of cup bit around the wire. Then I know it’s time to take the wire off. If I leave it too late it will start to get too far around the wire and that’s where we in danger of getting that scarring happening.
Close-Ups and Examples of Wire Damage
So there are definitely places in here and I’ll give you some really good close-ups which will explain a little bit better what I’m trying to say and then we can go through and start cutting off the wire. This area here is very tight and I wouldn’t be surprised if that’s grown out a little bit too far. There’s obviously quite a lot of swelling going on at this place here, where the branch starts and so there might be a little bit of damage.
Risks of Missing Tight Spots
Hopefully it’s not too bad. Sometimes, if it’s just a small amount it will grow out. It’s when it twists around and you see that horrible sort of spring, that spiralling effect, I really don’t like that. So that’s an area that might have gone a little bit too far. It’s surprising how you keep checking and yet it’s still very very easy to get caught out.
Comparing Branches and Bud Growth
So we’ll have a look at that bit in a minute. These branches here quite good examples really how some bits (where the wire probably wasn’t quite as tight) aren’t too bad and other bits are just showing those signs of sort of, not actually cutting, in but just getting too tight. As you can see we’ve got some really nice bud growth here. These little candles, these shoots that have extended out have grown really nicely.
Reviewing Top Development and Tea Break
So we’ve got to do a little bit of work to those in a minute. Doesn’t it look beautiful though! These buds on the top of the tree have grown really nicely. I am really pleased with these because this was the top and if you haven’t seen the original video, then it’s probably worth going back and watching it. Then this will kind of make sense really. But we’ve bent this one down here and by opening up this top bit here we’ve encouraged these little buds to grow out now and this will start to form the top of the tree. So they’re really lovely.
Before we start, one very important thing to do is to have some tea!
Tools and Cutting Off Wire
Right, I have some wire cutters and now I’m just going to go through and just carefully cut each section of wire and take it off. You can unwind the wire obviously, but you’re more likely to cause damage, especially if you’ve got small buds. You might damage the branch. So it is actually better to cut it off. It does seem a bit of a waste, but that’s entirely up to you.
Proper Wire Cutting Techniques
In my experience, it’s always better to cut it off. I always use bonsai wire cutters. You can use other types of cutters, like electrical wire snips, but they tend to be more pointy. These are very round on the end and that’s so that when you’re making contact with the branch, like that and you’re doing that, (I’m hoping not to cut myself now). But actually you’re not going to damage the tree or less likely to than if you have a pointy pair.
Following the Wire Down
So bonsai wire snips are probably up there as one of the top tools. Maybe we’ll do a video on the tools from the most important, you know, down the list of less important tools. But this is definitely important if you’re intending to do a lot of wiring. So, I’m just going to very carefully now, snip off each bit. I just take my time doing this so that I don’t accidentally damage the bark. That’s good! There is no damage there. The branch seems to have set quite nicely.
Careful Checking and Final Bits
That’s good! I always make sure that I follow the branch all the way down to the end to make sure all the wire has been removed, because sometimes if you just do a bit and then you jump around and do these other bits here, we can forget about the last bit on that branch. Especially if it’s all covered in foliage. Then of course that’s going to be left there forgotten about. So I always find it’s much better just to follow it all the way down to the end and make sure that each branch is clear of wire. I have forgotten them before.
Pruning Dominant Growth and Tweaks
And it all looks really good. We’re at the point where we identified it’s a little bit tight around here. I’m going to remove the wire and let’s see what’s underneath. Hopefully it’ll be okay. That’s good! It has a little bit of a dent there, but that’s fine. That’s really good! The branch as we’ve been taking the wire off hasn’t moved very much so the branch has set really nicely. I’m pleased with that. Right let’s carry on …
Spotting Buds and Managing Shoots in this Bonsai Tree Video
Just the top to finish off now. This bit around here. As I’m going through and I’m taking off the wire, I am always looking for new buds. As you can see here, there’s another one just poking through and the more buds that we can get to grow, the more opportunity we have to create new branches and new twigs and even create new shapes as well.
Reducing Growth Without Weakening the Tree
The black pine is not the best at budding back, so every time a new bud comes through a little smile creeps on my face and I think great. Let’s have a quick check around to make sure I haven’t missed any. With all the wire off there is a little bit of tweaking, a little bit of rewiring to do. But that’s okay.
Selective Pruning for Balance
I am now just going to show you couple of these big shoots here. I’m just going to reduce those a little bit. Obviously I need these to still grow – the smaller ones. But there are one or two that are really quite dominant. So, I need to just reduce those. I’m just going to prune those back. There are some down here! I’ll do this one because it’s very easy to show you.
Gradual Shaping with Tip Pruning
I can’t take them right off because I still need to keep some strength coming down this part of the tree. So I just need to reduce them a little bit. Working with black pines is ‘a little bit and often’. If you take too much off too quickly you’re quite likely to lose a branch. So I’m just going to do a little bit. All I’m going to do for now is just get this shoot and cut him off.
Planning for Future Development
I’ve been careful not to take cut these few needles here; so they’ll still grow and they’ll develop. I’m going to do the same with this one – just take the very tip off. Very carefully like that. So we’ll still get some strength around this bit and this branch will still be quite strong, but allow these to start to take over.
Finishing Touches and Looking Ahead
What I actually want to do is still keep enough strength down here to push out some new smaller buds over this coming year and then gradually I will reduce these down even more and replace them with some smaller ones. I’m just working my way around and I’m just reducing the dominant shoots, because they will just keep growing bigger and stronger and take the energy away from other parts of the tree.
Wrapping Up Today’s Work
That is as far as I’m going to go today. Obviously I’m going to just clear up all the wire, the bits of the off cuts, do a little bit of weeding, make sure he’s all tidy. There is some tweaking to do on some of these longer branches. These ones here, but I’m going to leave it for now. I’ve got lots of pruning to get on with today while the weather’s good so I’m going to spend the day outside here and what I’ll do is I’ll come back to this at another time and we’ll keep following on from this, this development, so in another few months we’ll get him back in front of the camera and see how he’s growing. But I’m really pleased with the way it’s coming along now. We hope you have enjoyed this bonsai tree video. If you would like to see more like this bonsai tree video, we have a You-Tube channel with weekly updates.


0 replies